The article below was produced by Michael Hampton for an illustrated article published in OUTDOOR AUSTRALIA magazine (2005). This has been edited and enlarged for this post.
Creaking under our novice bushwalker’s loads, my companions and I once joked that wouldn’t it be nice to have freeze-dried water, all you’d have to do was add water and hey…. well, it was a silly joke. The reality is a large proportion of organic matter (including the human body) is water, thus the weight (one litre of water equals one kilo). Like good little gear freaks we purchased and carried the limited range of freeze-dried meals available from specialized outdoors shops at the time. These tended to be expensive, ranging in a culinary scale from disgusting to OK (there was a brand of freeze-dried plain yoghurt that I miss). As time went by we drifted back to the standard set of spices and flavour bases, and supplemented dried ‘supermarket fare’ with heavier fresh ingredients. I was first exposed to home dried meals on backcountry trips in the United States. A friend even purchased and imported a US home dehydrator, even though it required a bulky transformer to handle Australian electrical currents. Of course dried food is nothing new. Familiar items such as the raisins and sultanas in our scroggin, not to mention the ubiquitous beef jerky are dried. Most of the lightweight products we buy from the supermarket and use in the outdoors are dried. But as the American backcountry chefs had demonstrated, many of the ingredients, and even our favorite recipes we enjoy at home, can be dried and enjoyed out on the trail.
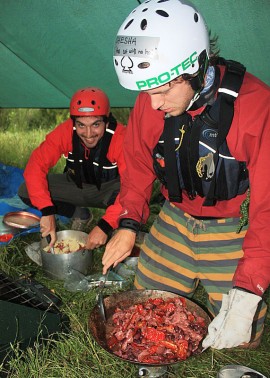 The advantages of removing the moisture content are twofold, preserving the food, and making it ‘light’. Commercially, this is done either by dehydration, or freeze-drying. The freeze-dried process involves ice being drawn from frozen food in a vacuum, with only marginal alteration in food value. Food dried using this method becomes extremely porous and will re-hydrate in one or two minutes. The equipment required for freeze-drying however, is well out the league of non-commercial interests. Dehydration on the other hand, is something anyone can do at home. Basically, the food is put on a porous tray and blasted with hot air. This process is less subtle than freeze-drying but is still very effective. Because of its simplicity outdoor enthusiasts may prepare and dry their meals at home ready for packing. Most households have got into the habit of cooking a little extra and freezing the leftover portions for fast meals at a later date. So why not dry it for your upcoming bushwalk? Whole dishes can be dried such as curries, stews and even some deserts. We have the option of drying complete meals, parts of meals or separate ingredients. Fruit and vegetables are ideal for drying. And it’s great to know how good the ingredients are, by utilising your own garden or taking advantage of the produce market.
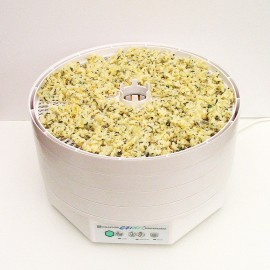 Household food driers consist of nesting trays with mesh bases that allow hot air to circulate upwards through the stack and around the food. The air is provided by a fan and heating element in the base of the unit. The lid has a vent so fresh air can be continually drawn in at the base and ‘used’ air is expelled at the top. Each tray is about the same size as a family size pizza. Commonly available food dehydrators sell for about $200. Lowering the amount of water or moisture in food prevents microbial growth and chemical reactions. Just like us, micro-organisms require water to survive and grow. Meat, vegetables and fruit are primarily water. By removing the moisture content we destroy the environment that micro-organisms need to thrive. The trade-off for rucksack enthusiasts is that we are also removing the heavy component—water.
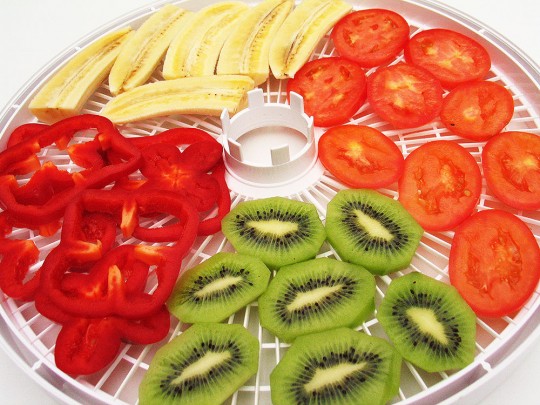 Enzymes contained within fruit and vegetables will cause discolouration, nutrient loss, and alterations in flavour. The blanching process inactivates these enzymes. Blanching involves placing produce in a colander and dipping in boiling water for a minute or two. It is then dipped in cold water, dried and placed on the drying tray. The home food drier instruction book will contain preparation tips and many useful recipes. Uniformity and consistency is the key. Slice and dice, keeping slices and cubes the same thickness (about 5mm). Driers should not be overfilled. All produce, and meals, is best dried in batches. Dry one meal (of two plus serves) per tray. Adding other produce midway through the cycle increases drying time. Food is checked near the end of the drying cycle to determine dryness. Adequately dried vegetables must contain about 5 percent water and fruits about 15 to 20 percent. When a cooled piece is torn in half and squeezed, no moisture should be evident. Drying times vary, depending on the load, but expect to wait 8 hours and more.
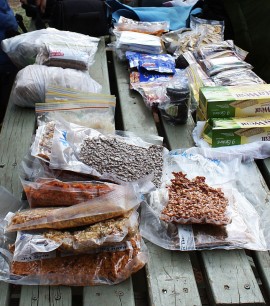 Once dried, the food is fully cooled and stored in zip lock plastic bags. These should be thoroughly squeezed before sealing to remove as much air as possible. Double bagging might be necessary. At home, and on the trail, dried food should be stored in a cool, dark and dry location. For longer periods store in the refrigerator or freeze. Reconstitution and ‘cooking in the field’ ranges from the simple addition of boiling water, with some reheating if required, to boiling and simmering for longer periods, although a good pre-soaking will reduce cooking time. A useful tip is to have a resealable container large enough to soak the evening meal during the day. Using the soaking water will result in less nutrient loss. Don’t forget that dried food is still food. Once moisture has been reintroduced the food will deteriorate and must be consumed promptly.
Introductory Drying Recipes
Most of these are reproduced or adapted from The Outdoor Gourmet by Michael Hampton
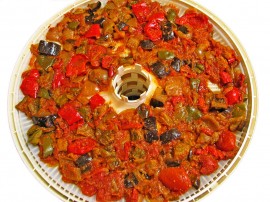
Ratatouille
Ratatouille is a basic European vegetable stew that utilises readily available summer vegetables. It makes a fantastic sauce for pasta, rice, noodles or polenta and can be ‘sexed up’ into all sorts of gourmet stews.
 1 tbsp oil
1 med onion
1 eggplant, diced
2 zucchini, sliced
6 roma tomatoes, chopped
1 large capsicum, chopped
Sauté onion, add other ingredients and cook on low heat for 1 hr until reduced. Mix through fresh parsley. Serve on. Add savoury fruits such as olives and capers. This is an ideal dish to be cooked in bulk amounts, dried or frozen or both, and packed in portions. Consume as is or use as a base for countless yummy sauces. If freezing do not include onion, add when reconstituting.
Try the following extras for a deluxe version:
Garlic
1 bay leaf
1 tsp basil
1 tsp marjoram
½ tsp oregano
dash of ground rosemary
red wine
1 tbsp tomato paste
salt and black pepper to taste
¼ cup olive oil
freshly chopped parsley
Give it an Asian touch by adding peanut butter and saté sauce
Vegetable Mash
This makes an excellent base for pasta sauce, curry or soup.
2 tsp oil
1 onion, finely chopped
2 cloves garlic, minced (optional)
1 cup pumpkin, cubed
1 cup sweet potato, cubed
2 carrots, cubed
1 cup water
pinch of sea salt
Sauté garlic and onions in oil. Add vegetables and water then boil until soft. Mash, blend, process or Bamix the lot to make a puree. Dry as per fruit leather. In the field add any combinations of herbs and spices and other flavor bases. Recommended additions include sour cream, olive oil, drizzled over, and coriander.
Moorish Bananas
 Bananas
Quality cooking chocolate or carob
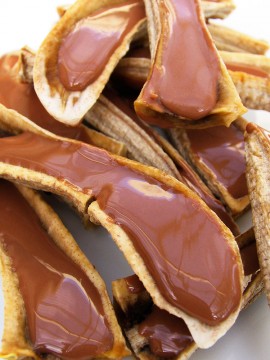
Halve bananas, then again lengthwise. Small bananas just lengthwise will do. The bananas will shrink a bit during drying. Place in drier flat sliced side up and dry until of a chewy texture. As the bananas dry they will become concave. Melt chocolate and spread into the concavity with a knife or spatula. Lay pieces on a tray and place in freezer for about 20 minutes to set chocolate. Store in cool place. Chocolate addicts may like to dip the bananas in the chocolate.
Tomato and Lentil Soup
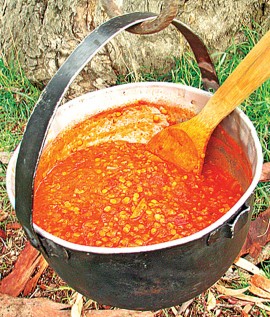
This recipe has become an all time favorite of mine and I make it at home regularly throughout winter. At home I might shallow fry large cubes of baked polenta until they are crispy and add them like croutons. It dehydrates and reconstitutes really well. Bacon bones add that yummy smoky flavour.
 1 onion, chopped
1 carrot, sliced
1 packet tomato soup
4 cups (1lt) water
½ cup red lentils
2 tbsp lemon juice
Heat a little oil and fry onions and carrots. Cook until onion is soft. Add soup, water and lentils. Bring to boil, then simmer covered 10-15 min or until lentils soft. Stir in juice just before serving. Serves 4. The juice can be omitted or you can substitute a lime for the lemon. If you intend drying it then keep mixture concentrated. Add bacon bones for truly awesome brew, and used tinned tomatoes. Remove meat from bones etc.
Cheesy Risotto
1 leek, sliced
1 clove garlic, chopped
½ red capsicum, chopped
1 celery stick, chopped
1 cup Arborio (or short grain) rice
1 cup reconstituted tomatoes
¼ cup wine
1 vegetable stock cube
1½ cups water
1 tbsp tomato paste
1 tsp paprika
½ cup grated cheese
Soak and par-boil rice. Fry the leek, garlic, capsicum and celery in a little oil for 2 min. Add rice and cook for 1 min making sure rice is well coated with mixture. Add tomatoes, stock cube, water, wine, tomato paste and paprika. Bring to boil, cover and simmer for 10 min or until rice is cooked. Stir occasionally. Stir in cheese and simmer until heated through and all the liquid is absorbed. Substitute the tin of tomatoes with an extra tbsp of tomato paste and extra 1/4 cup of water. The wine is optional, add ½ cup of water instead. Makes two generous serves.
Chickpea and Kumara Curry
 1 tbsp oil
1 clove garlic, crushed
1 medium onion, finely chopped
1 tsp cumin seeds
1 tsp mustard seeds
¼ tsp coriander
1½ tsp turmeric powder
½ tsp chilli
½ tsp salt
225g can chickpeas (or soaked/pressure cooked)
1 large kumara (or similar quantity of pumpkin or potato)
250 ml coconut milk (tin or reconstituted powder)
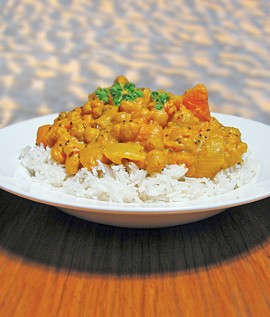
Peel, cube and par-boil kumara. Heat oil and roast cumin and mustard seeds. Add turmeric, onion, garlic, chilli, and coriander. Add kumara when onion is cooked. Add chickpeas, salt and coconut milk. Cook for 10 min and serve when nice and creamy. Spoon over basmati rice. Makes two generous serves.
Gormah Sabzi
I found this recipe in the quirky book “Rosewater and Soda Bread“ by Marsha Mehran. The story of three Iranian sisters making a new home in an Irish village. I tried it out on our 18 day off-track Larapinta/Chewings Range Traverse in 2009. Shortly afterwards I had an International student from Iran, via Canada, in a rockclimbing unit. I literally got him drooling when I described preparing and cooking this dish. It is a traditional Iranian dish and has an unusual bitter taste on first bite.
½ cup olive oil
1 cup fresh fenugreek, chopped, or 3 tablespoons dried fenugreek
½ cup fresh dill, chopped
1 ½ cups fresh parsley, chopped
1 cup fresh cilantro, chopped
1/3 cup fresh chives, chopped
2 cups fresh spinach, chopped
3 medium onions, chopped
3 teaspoons turmeric
2 ½ pounds stewing lamb, cut into 1 inch cubes
3 tablespoons lemon juice
4 cups water
Salt, Pepper
4 dried limes
2 16-ounce cans red kidney beans, rinsed
Heat a deep pan with ¼ cup olive oil. Add all herbs and spinach, stirring occasionally over medium heat for 15 minutes. Set aside. In a large stock pot, heat remaining ¼ cup of olive oil, then add onions and turmeric. Stir until golden brown. Add lamb, cooking for approximately 6 to 7 minutes, or until brown. Add cooked herbs, lemon juice, water, salt, and pepper. Let boil, then cover and simmer over low heat for 1 hour. Add dried lime. Cover and let simmer for 40 minutes. Add kidney beans, cooking for 20 minutes, covered. Using a fork, pierce the limes, releasing their juices into the stew. Remove from heat. Serve with a side of polow, saffron rice.
Fruit Leather
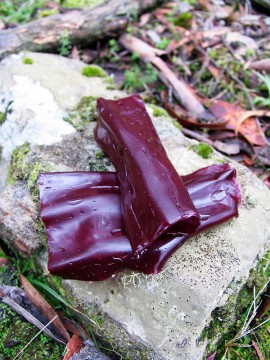 Make the most of that time of year when seasonal fruit hits the market shelves. Slice or chop fruit, removing any seeds or stems, and place in blender. To preserve color, add 1 tbsp of lemon juice per batch. Adding honey will sweeten the leather and make it more pliable when dry. The consistency should be like golden syrup or salsa, add a little juice or water if necessary. Once pureed spread evenly, and no more than 5 cm thick, on the lightly oiled heavy-duty plastic sheet that comes with your drier (2 cups of puree should cover the sheet nicely). Smooth out with a spatula to remove any bubbles. Pre-cooking the puree will give a brighter, appealing look and prevent oxidization, but cooking results in some nutrient loss. Bring fruit mixture to boil and simmer for a few minutes. Cool before spreading on tray. Set your food drier on medium heat and dry until leathery. Poll, place in bags and consume within a few weeks, or bag and store in freezer for longer periods.
Deluxe Brekky Fruit
This was a great success on a 2009 17-day walking trip across the West MacDonnell Ranges in Central Australia. Source Pomegranate molassess from a continental grocer, or buy some, crush the seeds and reduce the juice.
Bunch rhubarb, chopped into 5cm lengths (6 sticks)
4 apples, halved and thinly sliced
½ cup currants/sultanas/raisins
1 tbsp pomegranate molasses
1 tbsp dark brown sugar
Stew fruit for 20 minutes, or until tender. Dry into leather.
Tips For Preparing Dried Meals
Wintertime is definitely the best time for preparing and drying meals. It’s the season when sticky risottos and hearty stews go down a treat. One thing that I’ve discovered is that meat reconstitutes better if it’s been pre-cooked. What I mean is that the lamb that is going into your risotto for example, is the leftovers from a roast dinner, or similar. You can use the vegetables and gravy too. Lean meet that hasn’t been cooked slow or twice will often be tough when reconstituted.
More Information
 The Web is choc-a-bloc with drying information. Type “drying food” or “dehydrated food” into a search engine such as Google and you’re sure to come up with some interesting and informative hits. You can also purchase Micheal’s The Outdoor Gourmet ($22.95) from our bookshop here.

When you say keep the mixture concentrated if drying, does that mean dont add water? Anne