Posted on Leave a comment

Victoria’s Goldfield Walks On Sale Now!

Great news. Our newest title, Victoria’s Goldfield Walks, arrived in our warehouse this morning and will be in the shops from tomorrow. Authored by Glenn Tempest, this is the second offering in a new A5 series of walking guides to regional areas around Victoria. Victoria’s Goldfield Walks covers 20 walks in the central Victorian Goldfields around Bendigo, Ballarat, Castlemaine & Daylesford.

Produced in full colour with 96 pages it retails for just $19.95. As with our last two books, this guide also features free GPS downloads as well as regular online updates. Victoria’s Goldfield Walks is also available in our online bookshop.

Posted on Leave a comment

Lleida and Siurana, Spain

St.Llorenc de Montgai

So I didn’t get to add my next instalment whilst on holiday.  You know how it is. Wake up, eat breakfast, go climbing, eat lunch, have a nana nap, sorry, siesta, go climbing, eat dinner, drink sangria. Upload some photos for home and plan to write your next instalment the following evening.  Shame though that this was a continuing theme.  Shame for the next instalment obviously, not for the climbing, eating schedule.  There were also occasions where I inserted gallery gawking instead of the climbing.  I called these rest days except that there really was no rest happening.  Wore me out more than the climbing I reckon.

The last promise was to write of my adventures in Lleida and Siurana.

From Montserrat, it is a couple of hours to  where we had decided to set up hostel in the Lleida region. Dot on the map said Cubells. As we drove up the highway over the hill the hostel shone its best roadhouse sign.  Almost like it was just out of an american road trip movie….except in Spanish. Hostel Roma.
It was in fact the only roadhouse. Which as we discovered later, meant that it got very busy and very noisy both in the evening dinnertime and at morning breakfast.  The spanish are energetic and passionate talkers. Having only minimal Spanish in my vocabulary I really wasn’t able to decipher what they were talking about most of the time.  Whatever it was though, they often seemed to disagree wholeheartedly with each other one minute and  then…disagree wholeheartedly with each other the next. All part of the charm of travelling on the road in Spain.

Camarasa. Marcant Estil sector

Wanting to engage in, and experience climbing situations quite unlike we have in Australia and especially Victoria, we thought we would throw ourselves into it and hit the roadside crag experience –  Camarasa and the Marcant Estil sector  When I say roadside, that’s exactly what I mean. Drive along the road. Stop. Get out of car. Take a few steps. Climb. As you would imagine, being limestone and ridiculously accessible, there was an issue with polished holds from so much climbing traffic. Being my first time on limestone, it was a little disconcerting putting a foot in a sloping polished pocket but like everything you get the hang of it. Despite this, I did enjoy the climbs at Camarasa. We were looking at climbing most things in the 6a/a+ region but wanted a few lower grades to warm up on.  There was a decent enough selection of 5’s on offer to keep lower grade climbers happy for a bit. The climbing was interesting. Although the lower tier cliffs are only around the 25m mark, some would vary quite markedly. Starting off with technical balancy moves, moving into an overhung crank, you could then find yourself moving up a slab with one finger pockets and small pinch grips. We managed to get about 6 climbs in before the heat of day pushed us off.  What I could imagine with this crag was climbers visiting it to do a couple of laps before heading off to work for the day and equally the same at night. That I could definitely get to like! There is a huge range of climbs also in the upper tiers that range from a 5 min to 25 min walk.

Cubells from the approach

The namesake crag of where we were staying, Cubells, was one of the first cliffs developed in the Lleida region and since the hordes have moved onto newer pastures to develop, it was a great opportunity to jump on some rock that didn’t suffer so much from the Mr Sheen effect.  We had a great time at this cliff despite the heat of the sun. We started quite early as there was no real shade. Friction was perfect and we had the whole place to ourselves. Again a cliff to suit all with climbs starting from 5’s.

Cubells. Sectors For Fred & Foradat

In the downtime – when clever Spaniards have their siestas, Cam and I took advantage of our air conditioned car and visited some of those cliffs where the big boys and girls play.  Just to look.  Just to dream. Oliana. Cova de Gran Santa Linya.

Oliana
Cova Gran de Santa Linya

Siurana, whilst close to Lleida, is in the Tarragona region.  But like Lleida, an endless stream of rock. We were staying at the Siurana Camping which is owned and run by climber Toni Arbones and his family. We stayed in one of the self catering bungalows which was great but there are a variety of accommodation options, from the bungalows to just beds.  Communal kitchen, as well as a cafe which serves a pretty mean Paella.  Perfect for an end to a great climbing day.  Siurana had it’s own version of Camarasa.  Not so much on the side of the road, more like to the side of the summit carpark.

Can Melafots. Siurana

Can Melafots. Walk in time. 0 minutes. Afternoon sun. Grade range from 5 up to about 8a. Good selection of climbs in the 6-7 region. Perfect when you only have a couple of days there. Of course being so accessible it did look a bit polished. We once again did a recce of the area so that we were well prepared the next day when we finally hit rock. As it goes, we didn’t end up climbing at Can Melafots as the next mornings climbs on another tier down, had us experience more polish on a couple of climbs.  We decided to hunt for a more out of the way cliff for the afternoon in order to get some friction. After lunch, we headed into the little hilltop town of Siurana for a wander before at last collapsing like a local come the afternoon heat.

Siurana 8 km sign

Once awoken from our nana naps, sorry, siesta, we headed down past the popular cliffs to find a friction crag.  We were not disappointed.  I think we stumbled upon a cliff which was in the early stages of some development.  New bolts, new rocks, needles for friction and very little traffic appeared to have come its way. We had a fun afternoon on climbs nothing harder than 6a. After dodging a few small pebbles that seemed to be falling regularly, we then gazed around us and saw a selection of broken rock pieces. We were right.  It hadn’t seem much traffic. We at once felt warm and fuzzy that we were engaged in community service.  Helping to clean the cliff from useless, loose rock. Ensuring that others after us could climb in peace.  Despite the falling rock (I like to call it adventure), it was once again a great session.  So the day tally ended up:. 6 morning climbs. 1 visit to local village and summit area. 1 nana nap. 6 afternoon climbs. Sangria. Yay! The next day it was time to head off. Siurana was unfortunately, a very brief stop on our climbing journey.  I like to think of it as just a taster.  There will most definitely be a return trip!

View from Can Melafots. Siurana

Excitement was already building for the next stop. Costa Blanca.

Posted on 2 Comments

Koh Yao Noi, Stepping Back in Time

Steve Holloway and Bus on the way back from Grateful Wall, Koh Yao Noi.

It’s hard to believe that 20 years have passed since I first climbed in Thailand. Of course back in 1992 Phra-Nang was nothing like it is today. Tonsai was completely undeveloped with just a few rough huts set back in the jungle. Railay had a bunch of basic bungalow systems and it was only the Dusit Rayavadee that was regarded as upmarket (in 1993 we watched Mick Jagger and his entourage arrive by helicopter). Karen and I spent our very first night in Thailand at Sand Sea Bungalows, which, for less than two dollars, provided us with an open bamboo hut that could easily have featured in the movie Apocalypse Now. On nearby Phra-Nang Beach, King and Tex were dragging hapless beginners up The Money Maker (6a+, 18) for 30 baht ($1) a pop and we were busy cranking It’s a Boy 7b (25-26) through the spectacular Princess Cave (and which is now quite rightly closed to climbing). Over the next few years I wrote a small guide to Phra-Nang for Wild Publications (in Australia) and my articles and photographs appeared in a variety of magazines including Climbing, Rock and Ice, Rock, Outdoor Australia and Action Asia. Combined with the efforts of a small group of other climbers (such as Sam Lightner) it wasn’t long before Thailand was seen for what it truly was, that is one of the most remarkable climbing destinations on earth.

Sunrise at 6am. Koyao Resort on Koh Yao Noi.

Of course all this came at a price. These days climbing at Railay and Tonsai during the peak season can be uncomfortably crowded. Popular cliffs such as the Keep, Fire Wall or Monkey World are often packed and it’s not uncommon to have to wait in queue. Tonsai Wall and Dums Kitchen are overflowing with muscular brown torsos, writhing tattoos, jostling guides and some of the most polished routes you’ll ever have the misfortune to slip off. As for 123 Wall at Railay East, do yourself a favour and get there early (well before 7am) and make sure your off your climb and heading for breakfast by 8.30am. After that it will be wall to wall chaos.

HD Wall (facing) and Big Tree Wall profile. Koh Yao Noi.

So is there anywhere in Thailand that you can still climb and avoid the crowds? Indeed there is. Koh Yao Noi is an island about an hours long-tail ride west of Railay Beach and is situated smack bang in the middle of Phang-Nga Bay. Koh Yao Noi means Small Long Island and its southern (larger) neighbor is called Koh Yao Yai (or Big Long Island). The two islands are separated by a narrow channel. Koh Yao Noi is home to about 4000 people, mainly Muslim, most of whom earn their living by fishing, farming and agriculture. Unlike nearby Phuket, Koh Yao Noi is a very quiet place and is more like the Thailand I remember from 20 years ago. There are no glitzy resorts, no traffic, no nightclubs and no crowds. Here the locals are much more relaxed, friendly and with smiles as wide as an Andaman sunrise.

The Climbing

There are about ten cliffs currently under development, all of which are located on the northern tip of Koh Yao Noi and its nearby islands. The area has been developed mainly by Mark Miner (and his mates Drew Spalding, Justin Day etc) who co-runs (with his wife, Heather) the Mountain Shop in Tha Khao village. These guys have put in one hell of a lot of hard work, having spent a small fortune in bolts and glue. There are currently about 160 climbs. Most are single pitch but there are some that reach four pitches. Almost all of the routes are protected with titanium bolts combined with Hilti RE-500 glue. To be honest the climbing isn’t anywhere near as convenient as Phra-Nang as all of the crags on Koh Yao Noi require some form of transport to reach them (either by boat or by scooter). Forget about cliffs towering above white sandy beaches, here on Koh Yao Noi the cliffs rise from either the jungle or directly from the sea. The payoff is that you will enjoy some superb climbing, no crowds and barely a polished hold in sight. Here is a quick overview of three of the better cliffs on Koh Yao Noi.

 Grateful Wall

This remarkable orange and gray cliff is arguably one of the best ‘more moderate’ crags in Thailand. Grateful Wall hangs over the sea, which means it requires a boat to reach it. A bamboo ladder provides access to a narrow ledge that runs the length of the cliff about 10m above the water. Grateful Wall is also blessed with shade all day. It doesn’t get much better than this.

Romano Frosio, owner of La Luna Pizzeria on Wharf Rat 6b (20), Grateful Wall.

There are currently ten routes here, ranging from 6a (17) to 7a (24). Every route is an absolute pocket-pulling classic of between 25m and 60m. Bring along a 70m rope to be safe (and tie a knot in the end of the rope). Standout climbs include Candyman (6b, 20), New Speedway Boogie 6c+ (23), Monkey and the Engineer 6b+ (21) and Franklins Tower 6a+ (19). The two pitch Fire on the Mountain is also well worth ticking, if only to experience the trouser-filling exposure and exquisite moves on the final 6c (22) pitch.

Signpost in the jungle, just so you don’t get lost.

The Mitt

This steep white wall looks vaguely like the side of a collapsing wedding cake, rising straight out of the jungle and literally dripping with massive stalactites. The Mitt has around 30 climbs ranging from 6a to 7c. Here you will be confronted with the most concentrated collection of harder routes on Koh Yao Noi. Most climbs require at least a 60m rope with some routes requiring 70m and 80m ropes. Remember to tie a knot in the end of your rope.

Amanda Holloway bridging on Daddy Long Legs 6b (20), the Mitt.

Of the easier routes Daddy Long Legs (6b, 20) is a standout classic. The route overhangs 8m in 25m as you swing from stalactite to stalactite. Watch out for nearby Black Widow, which is a sandbag at 6c! Spiderman 6c+ (23) is a 30m endurance marathon at the grade. You have to approach the Mitt via a very rough 30min scooter ride up the spine of the island to the Paradise Koh Yao Resort. From the resort it is a 15min walk up through the jungle. To avoid the scooter ride (which can be dangerous in wet weather) you should consider renting a long-tail boat for the day.

Amanda and Karen at the base of the Mitt.

Big Tree Wall

In some ways this is Koh Yao Noi’s answer to Thaiwand Wall over at Railay. True, Big Tree Wall isn’t quite as impressive, but what it does have is a dozen or so mega-classic routes of between two and four pitches at grades that are generally more ‘tickable’ for the majority of climbers. Big Tree Wall is accessed as for the Mitt and requires a 25min jungle walk. You can also approach Big Tree Wall from the sea via a long-tail boat, which is generally much quicker and easier.

Upmarket Koyao Resort, Koh Yao Noi.

Accommodation

There are plenty of bungalows and resorts on the island, most of which are concentrated along the southeastern coast. A lot of climbers seem to stay at Namtok Bungalows, which charge between 450 and 1300 baht ($15 and $43) per night. For those looking for a bit more comfort you could check out Lom Lae Beach Resort or Sabai Corner Bungalows. For the last two seasons Karen and I have stayed at the rather more upmarket Koyao Island Resort, which (like many resorts) have good deals before the start of high season on 01 November. Rooms here are upwards of 5500 baht ($180) per night.

Hanging the gear out to dry. Koyao Resort, Koh Yao Noi.

Tips

Get yourself a Thai sim card for your phone. We have had great results with the local carrier AIS, which has a surprisingly good service throughout the Andaman islands including Phra-Nang and Koh Yao Noi. You can purchase a 3G sim card from the arrivals hall at Bangkok Airport and top it up at any Seven Eleven or Mini Mart. I usually go for a 669 baht ($22) card which allows for 1GB of internet data as well as plenty of free local calls. If you just want local phone calls (no internet) then purchase a sim card from any Seven Eleven or Mini Mart. Note that there are different sizes of sim cards depending upon your smart phone model.

Fill her up. Scooters at the gas station, Koh Yao Noi.

Rent a scooter for your entire stay on the island. Scooters cost around 200 – 300 baht ($7 to $10) per day. You will need a scooter to access some of the crags (if you don’t decide to rent a long-tail) and you will need it to get to cafes, restaurants and visit nearby villages.

Some of the best cliffs are accessible only via a long-tail boat. The daily rental of a long-tail will set you back about 1800 baht (about $60) per day. The Mountain Shop can arrange everything and will also help organise other climbers that may want to share the cost.

The Koh Yao Noi Rock Climbing guide is available only from the Mountain Shop. To be honest I’ve so far been unable to purchase a copy as they always seem to be out of print. Luckily, during my last two visits to the island, I’ve been able to borrow a copy (on both occasions we left a donation for the use of the guide, which will go towards more titanium bolts and glue). If you’re heading over this season I’d suggest dropping the folks at the Mountain Shop an email and asking if the guide is currently available. If you have the King Climbers Thailand Route Guide Book then you at least have the descriptions for The Mitt and for Grateful Wall.

Replaced carabiners showing signs of advanced wear.

Take a few spare ‘leaver biners’ and slings. Quite a few of the lower-offs at Koh Yao Noi are just opposing carabiners, many which are showing signs of advanced wear. Do the right thing and replace any biners or slings when necessary.

Restaurants

There are lots of cafes and restaurants on the island. A few of the better places that I’ve eaten include La Luna Pizzeria (the owner, Romano, is a climber and his pizzas and pastas are simply amazing), Je T’aime restaurant (sort of a Thai, French and Danish fusion!), Good View Restaurant (great sunsets, tasty Thai seafood) and the Para Bar (super Thai food, fantastic atmosphere).

Getting There

You can reach either Manoh or Tha Khao Piers (both on Koh Yao Noi) via speed boat directly from Tha Lane Pier on the mainland, which will cost you about 250 baht ($8). A taxi between Krabi and Tha Lane Pier will cost you about 800 baht ($27). Boats also leave from Ao Nang (near Railay), which can be more convenient for climbers. This trip via speed boat will take about 50min and cost you maybe 500 baht ($17). The most convenient option though (if you’re coming from Railay) is to simply rent your own long-tail boat for 4000 baht ($130), which will take you directly to Tha Khao Pier on Koh Yao Noi.

Posted on 4 Comments

Three Days Along the Great Ocean Walk

Ben Spencer is our guest blogger. Images by Grant Hawkins.

Day 1 – Milanesia Beach to Ryans Den

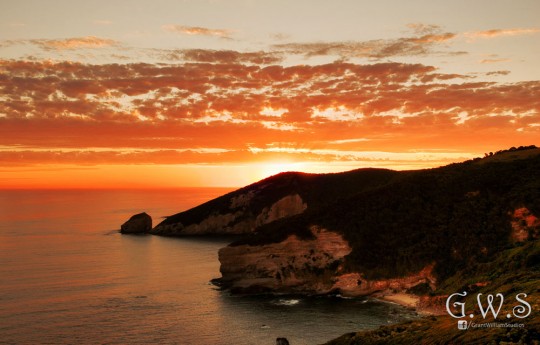
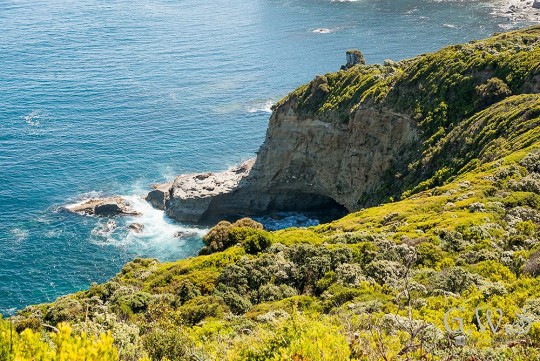
With much anticipation we were finally bound for the Great Ocean Walk – a 90km snaking trail along the Victorian coastline from Apollo Bay to The Twelve Apostles. Our crew comprised of my dad and three mates and we intended to tackle the last 40km stretch of this famous trail, linking Milanesia Beach to the Twelve Apostles. After about 3 hours driving from Melbourne, we turned off the Great Ocean Road onto a steep dirt track more suited to four wheel drive vehicles. Our two-wheeler managed okay, but I wouldn’t recommend trying it in the wet! The rough track abruptly ended with breathtaking views over imposing sea cliffs that dropped into an expansive blue ocean.

Eager to crack onwards, we shouldered our heavy packs and hit the trail, which almost immediately got really steep as it descended to secluded Milanesia beach. It was quickly obvious that the only way onwards was up and, once again it was very steep! A pattern was quickly forming and the lads pondered aloud what they’d got themselves into. The hot sun was beating down, the climb was arduous on untrained limbs, our packs were heavy and we’d only just started! After an extended and challenging ascent, we struggled to the crest of a hill and found the perfect vantage point for lunch. The outlook was spectacular and was everything I had envisaged when dreaming of the walk. Most definitely a ‘lunch with a view’. Note to self – stow food in an accessible place to avoid unpacking the whole rig whenever I got hungry.

With lunch done and plenty of sunscreen applied, we headed off again knowing it was only a short day of walking. The remainder of our hike through to camp was as steep as it had started and we were very pleased to drop our packs on arrival. We’d been told the camp was booked out but contrary to this we found it empty except for one other party. We chose a great campsite screened by shrubs and within a few steps of stunning outlooks over cliffs and ocean.

Having set-up camp without too much issue (I feared my tent looked a bit small for two lads) we went about the next order of business; dinner. Pizzas were on the menu and in no time at all we were enjoying our feast and soaking up the amazing vistas surrounding us. The remainder of the evening was spent boiling water from the tank to kill potential bacteria, waiting for it to cool and filling our drink bottles. This process took a considerable time because we needed a fair bit of water.

Day 2 – Ryans Den to Devils Kitchen

Sleep had been hard to come by, probably due to a few factors – the hard ground, the warmth of the night and the unfamiliarity of sleeping in a tent. Rain had swept through at 4am and we had to rescue some items that had been left outside, including my bag – another lesson learned. We were up at 6am and away by 8am. We needed to get away early so as to arrive at the beach section of the walk at low tide. The day’s walk started much the same as yesterday with lots of ups and downs but with amazing views as the reward for having gained the top of each climb. The notes listed this section as the hardest of the walk so we knew a big day was in store. Dad got his pack sitting better so that his hips were taking the weight, which he said felt much more comfortable than the previous day. Everyone was in good spirits and we made good time as the landscape varied from cliffs to paddocks to bush and back to cliffs again.

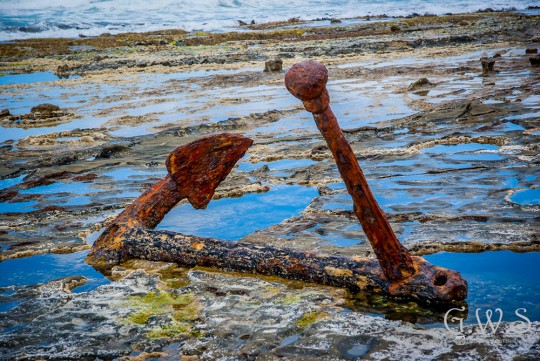
The trail was well worn and there was no chance of getting lost but it resulted in a lack of wildlife – animals seemingly knew to stay well away. Eventually we arrived at a set of stairs that lead to the beach segment of the walk – we had timed things perfectly as low tide was reported to be at 11:47am and we had arrived at 11:45am. The map listed the staircase as 364 steps but I didn’t let the lads know because a few were fading with at least 12km of territory already covered for the day. Arriving at the beach, we could see why it was necessary to traverse it at low tide – there was very little sand between the cliff and the water’s edge and high tide would leave no sand uncovered. Waves crashed over exposed reefs and we explored the rock pools as we ambled along the beach – losing our haste and enjoying the moment. Remains of two old ship wrecks, including an anchor, were a reminder of how devastating and unforgiving this wild coast could be.

We continued along the beach until spotting the trail heading back up the slopes. At this juncture, we stopped for lunch on the beach, satisfied that we’d broken the back of the days walking and had only a short section until camp. A liberal coating of repellant warded off the march flies and allowed us to soak up the serenity of this isolated beach. It was also an ideal place to tuck into a big lunch. The last tiring climb was a steep one and we were relieved to finally reach our campsite, a place we all agreed equaled the previous nights ‘wow’ factor.

We took our time setting up camp as we had arrived mid-afternoon and there was little else to do except relax, take pictures and get cricket updates – Clarke made over 300 runs against India. Dinner time came around and I happily cooked the grub I’d been carrying for two days. The meal was well received by the boys and all the food was polished off (next time I’ll bring more noodles!). With dinner done, we set about boiling more water for the following day, which fortunately didn’t take as long as the previous night. As the sun sank low in the sky we ventured down to the beach for a quick dip, though the ever-present reef stopped us from venturing too far out.

Day 3 – Devils Kitchen to The Twelve Apostles

We were up at 6am again and away by 7:30am. Faster this time and keen to walk in the coolest part of the day. The route was much flatter and the troops enjoyed this style of walking a lot more. We left the cliff-tops behind for a period as we moved into the typical Aussie bush that I’m more accustomed to. This change in vegetation necessitated the cleaning of our boots in a washing station to stop the passing of cinnamon fungus (phytophthora cinnamomi), a nasty pathogen that attacks tree roots. Soon afterwards we reached the exposed cliff-top again and encountered a person at one of the view points, which was the first sign we were nearing the end of the walk. At this point, foliage was growing over the track, making things difficult – for some reason the rangers had neglected to maintain this section. Long pants would have been beneficial but it was too hot to wear them so we endured. Eventually we pushed through into a clearing to be greeted by superb views of the Gellibrand River snaking past Princetown Recreation Reserve – our finishing point.

Before long we were back at the car with plenty of back-slapping and congratulations. It was a further 6km to the Twelve Apostles and we decided to complete it on foot – leaving the packs in the car of course! The views walking towards the Twelve apostles were memorable and provided a totally different perspective when compared to the usual driving approach.

Arriving at the first apostle we ventured down to the beach to look up at the massive rock tower. Strangely the track petered out at this point, despite the map saying it went for another kilometre to the Twelve Apostles Information Centre. Not to be deterred, we finished the last little bit along the road and made it to the end! It was an amazing trip where jaw-dropping views became the norm – I certainly recommend this walk to anyone considering it.

Posted on Leave a comment

Barcelona and Montserrat

Having promised to write some blog posts for Open Spaces during my travels, I thought it was about time I did. Otherwise it will end up like all the postcards one promises to send, where your loved ones receive them after you have returned. Come to think of it…postcards??

So where was I? Oh, that’s right. Sunny Spain. Cameron and I have planned a 5 week adventure to Spain and Morocco, traveling to see the sights and climbing whenever we can at key climbing areas.

After a quick two day stop in London to catch up with friends, we flew to Barcelona for a 3 day, 4 night city visit. Long before Spain was a climbing destination for me, it was a must visit soul feed of Gaudi and artistic interests. Can’t say I was disappointed. A buzzing city full of visual delights, the only downfall was having to share those wondrous Gaudi spaces with others. We were lucky that we missed queues but to find an empty corner without other human content was not the easiest. Still there were moments where I lost myself in the fantastical organic swirls, whorls and spirals of nature inspired shapes that Antoni Gaudi is so famous for. After a few evenings of tapas and Sangria, we finished off our visit with a trip two hours out of Barcelona to visit the Salvador Dali gallery/museum/theatre. Too many people in large groups took away much of the enjoyment with many of the visitors appearing to just be moving around the gallery rather than observing any of the work. Possibly just a stop on their tour program or maybe overwhelmed by the a mount of people and quantity of works on display. Still, regardless of whether or not you are a Dali fan, the sense and theatre of Dali was definitely tangible.

Time to head out of the city and away from the cultural activities and indulge in some fresh air and….climbing.

Montserrat. Only a 50 minute drive from Barcelona and one is completely surrounded by, in awe of and inspired by the endless rock. Spending the rest of the day scoping out the area and planning our two day attack on suitable climbs, we aimed to start on a few shorter routes on day one and then finish with a long multi-pitch on the Gorro Frigi day two.

The first day didn’t quite go as planned, but all for the better anyway. We came across an area close to one of the walking tracks that looked like it had some shorter routes that we could climb. We only had a couple of topos to the Montserrat area and this wasn’t one of them. Anyway, long story short – 6 pitches later we topped out. So much for the short route. Fantastic! The next day dawned, and by hook or by crook I was determined to get on Badalona on the Gorro Frigi. As we didn’t want to build up our leg muscles too much by climbing the steep stairs for 45 mins in order to access the route (we were in sport climber mode after all) we chose to cough up the dosh and ride up in style via the funicular. Good choice I say.

Badalona was an awesome day out. I loved the unique experience that Montserrat provides with its wild conglomerate rock. So many choices of what embedded rock or pebble to grab. Will it be good, will it hold, will I have to yell out “below”? One thing I can say for certain is that when climbing at Montserrat, pack your helmet.

Two packed days at Montserrat and it was time to move on to new rock pastures. Lleida and Siurana. More on that next installment.


Posted on 1 Comment

The Outdoor Gourmet and Drying Food

The article below was produced by Michael Hampton for an illustrated article published in OUTDOOR AUSTRALIA magazine (2005). This has been edited and enlarged for this post.

Creaking under our novice bushwalker’s loads, my companions and I once joked that wouldn’t it be nice to have freeze-dried water, all you’d have to do was add water and hey…. well, it was a silly joke. The reality is a large proportion of organic matter (including the human body) is water, thus the weight (one litre of water equals one kilo). Like good little gear freaks we purchased and carried the limited range of freeze-dried meals available from specialized outdoors shops at the time. These tended to be expensive, ranging in a culinary scale from disgusting to OK (there was a brand of freeze-dried plain yoghurt that I miss). As time went by we drifted back to the standard set of spices and flavour bases, and supplemented dried ‘supermarket fare’ with heavier fresh ingredients. I was first exposed to home dried meals on backcountry trips in the United States. A friend even purchased and imported a US home dehydrator, even though it required a bulky transformer to handle Australian electrical currents. Of course dried food is nothing new. Familiar items such as the raisins and sultanas in our scroggin, not to mention the ubiquitous beef jerky are dried. Most of the lightweight products we buy from the supermarket and use in the outdoors are dried. But as the American backcountry chefs had demonstrated, many of the ingredients, and even our favorite recipes we enjoy at home, can be dried and enjoyed out on the trail.

The advantages of removing the moisture content are twofold, preserving the food, and making it ‘light’. Commercially, this is done either by dehydration, or freeze-drying. The freeze-dried process involves ice being drawn from frozen food in a vacuum, with only marginal alteration in food value. Food dried using this method becomes extremely porous and will re-hydrate in one or two minutes. The equipment required for freeze-drying however, is well out the league of non-commercial interests. Dehydration on the other hand, is something anyone can do at home. Basically, the food is put on a porous tray and blasted with hot air. This process is less subtle than freeze-drying but is still very effective. Because of its simplicity outdoor enthusiasts may prepare and dry their meals at home ready for packing. Most households have got into the habit of cooking a little extra and freezing the leftover portions for fast meals at a later date. So why not dry it for your upcoming bushwalk? Whole dishes can be dried such as curries, stews and even some deserts. We have the option of drying complete meals, parts of meals or separate ingredients. Fruit and vegetables are ideal for drying. And it’s great to know how good the ingredients are, by utilising your own garden or taking advantage of the produce market.

Household food driers consist of nesting trays with mesh bases that allow hot air to circulate upwards through the stack and around the food. The air is provided by a fan and heating element in the base of the unit. The lid has a vent so fresh air can be continually drawn in at the base and ‘used’ air is expelled at the top. Each tray is about the same size as a family size pizza. Commonly available food dehydrators sell for about $200. Lowering the amount of water or moisture in food prevents microbial growth and chemical reactions. Just like us, micro-organisms require water to survive and grow. Meat, vegetables and fruit are primarily water. By removing the moisture content we destroy the environment that micro-organisms need to thrive. The trade-off for rucksack enthusiasts is that we are also removing the heavy component—water.

Enzymes contained within fruit and vegetables will cause discolouration, nutrient loss, and alterations in flavour. The blanching process inactivates these enzymes. Blanching involves placing produce in a colander and dipping in boiling water for a minute or two. It is then dipped in cold water, dried and placed on the drying tray. The home food drier instruction book will contain preparation tips and many useful recipes. Uniformity and consistency is the key. Slice and dice, keeping slices and cubes the same thickness (about 5mm). Driers should not be overfilled. All produce, and meals, is best dried in batches. Dry one meal (of two plus serves) per tray. Adding other produce midway through the cycle increases drying time. Food is checked near the end of the drying cycle to determine dryness. Adequately dried vegetables must contain about 5 percent water and fruits about 15 to 20 percent. When a cooled piece is torn in half and squeezed, no moisture should be evident. Drying times vary, depending on the load, but expect to wait 8 hours and more.

Once dried, the food is fully cooled and stored in zip lock plastic bags. These should be thoroughly squeezed before sealing to remove as much air as possible. Double bagging might be necessary. At home, and on the trail, dried food should be stored in a cool, dark and dry location. For longer periods store in the refrigerator or freeze. Reconstitution and ‘cooking in the field’ ranges from the simple addition of boiling water, with some reheating if required, to boiling and simmering for longer periods, although a good pre-soaking will reduce cooking time. A useful tip is to have a resealable container large enough to soak the evening meal during the day. Using the soaking water will result in less nutrient loss. Don’t forget that dried food is still food. Once moisture has been reintroduced the food will deteriorate and must be consumed promptly.


Introductory Drying Recipes

Most of these are reproduced or adapted from The Outdoor Gourmet by Michael Hampton


Ratatouille

Ratatouille is a basic European vegetable stew that utilises readily available summer vegetables. It makes a fantastic sauce for pasta, rice, noodles or polenta and can be ‘sexed up’ into all sorts of gourmet stews.

1 tbsp oil
1 med onion
1 eggplant, diced
2 zucchini, sliced
6 roma tomatoes, chopped
1 large capsicum, chopped

Sauté onion, add other ingredients and cook on low heat for 1 hr until reduced. Mix through fresh parsley. Serve on. Add savoury fruits such as olives and capers. This is an ideal dish to be cooked in bulk amounts, dried or frozen or both, and packed in portions. Consume as is or use as a base for countless yummy sauces. If freezing do not include onion, add when reconstituting.

Try the following extras for a deluxe version:
Garlic
1 bay leaf
1 tsp basil
1 tsp marjoram
½ tsp oregano
dash of ground rosemary
red wine
1 tbsp tomato paste
salt and black pepper to taste
¼ cup olive oil
freshly chopped parsley
Give it an Asian touch by adding peanut butter and saté sauce


Vegetable Mash

This makes an excellent base for pasta sauce, curry or soup.

2 tsp oil
1 onion, finely chopped
2 cloves garlic, minced (optional)
1 cup pumpkin, cubed
1 cup sweet potato, cubed
2 carrots, cubed
1 cup water
pinch of sea salt

Sauté garlic and onions in oil. Add vegetables and water then boil until soft. Mash, blend, process or Bamix the lot to make a puree. Dry as per fruit leather. In the field add any combinations of herbs and spices and other flavor bases. Recommended additions include sour cream, olive oil, drizzled over, and coriander.


Moorish Bananas

Bananas
Quality cooking chocolate or carob

Halve bananas, then again lengthwise. Small bananas just lengthwise will do. The bananas will shrink a bit during drying. Place in drier flat sliced side up and dry until of a chewy texture. As the bananas dry they will become concave. Melt chocolate and spread into the concavity with a knife or spatula. Lay pieces on a tray and place in freezer for about 20 minutes to set chocolate. Store in cool place. Chocolate addicts may like to dip the bananas in the chocolate.


Tomato and Lentil Soup
This recipe has become an all time favorite of mine and I make it at home regularly throughout winter. At home I might shallow fry large cubes of baked polenta until they are crispy and add them like croutons. It dehydrates and reconstitutes really well. Bacon bones add that yummy smoky flavour.

1 onion, chopped
1 carrot, sliced
1 packet tomato soup
4 cups (1lt) water
½ cup red lentils
2 tbsp lemon juice

Heat a little oil and fry onions and carrots. Cook until onion is soft. Add soup, water and lentils. Bring to boil, then simmer covered 10-15 min or until lentils soft. Stir in juice just before serving. Serves 4. The juice can be omitted or you can substitute a lime for the lemon. If you intend drying it then keep mixture concentrated. Add bacon bones for truly awesome brew, and used tinned tomatoes. Remove meat from bones etc.


Cheesy Risotto

1 leek, sliced
1 clove garlic, chopped
½ red capsicum, chopped
1 celery stick, chopped
1 cup Arborio (or short grain) rice
1 cup reconstituted tomatoes
¼ cup wine
1 vegetable stock cube
1½ cups water
1 tbsp tomato paste
1 tsp paprika
½ cup grated cheese

Soak and par-boil rice. Fry the leek, garlic, capsicum and celery in a little oil for 2 min. Add rice and cook for 1 min making sure rice is well coated with mixture. Add tomatoes, stock cube, water, wine, tomato paste and paprika. Bring to boil, cover and simmer for 10 min or until rice is cooked. Stir occasionally. Stir in cheese and simmer until heated through and all the liquid is absorbed. Substitute the tin of tomatoes with an extra tbsp of tomato paste and extra 1/4 cup of water. The wine is optional, add ½ cup of water instead. Makes two generous serves.


Chickpea and Kumara Curry

1 tbsp oil
1 clove garlic, crushed
1 medium onion, finely chopped
1 tsp cumin seeds
1 tsp mustard seeds
¼ tsp coriander
1½ tsp turmeric powder
½ tsp chilli
½ tsp salt
225g can chickpeas (or soaked/pressure cooked)
1 large kumara (or similar quantity of pumpkin or potato)
250 ml coconut milk (tin or reconstituted powder)

Peel, cube and par-boil kumara. Heat oil and roast cumin and mustard seeds. Add turmeric, onion, garlic, chilli, and coriander. Add kumara when onion is cooked. Add chickpeas, salt and coconut milk. Cook for 10 min and serve when nice and creamy. Spoon over basmati rice. Makes two generous serves.


Gormah Sabzi

I found this recipe in the quirky book “Rosewater and Soda Bread“ by Marsha Mehran. The story of three Iranian sisters making a new home in an Irish village. I tried it out on our 18 day off-track Larapinta/Chewings Range Traverse in 2009. Shortly afterwards I had an International student from Iran, via Canada, in a rockclimbing unit. I literally got him drooling when I described preparing and cooking this dish. It is a traditional Iranian dish and has an unusual bitter taste on first bite.

½ cup olive oil
1 cup fresh fenugreek, chopped, or 3 tablespoons dried fenugreek
½ cup fresh dill, chopped
1 ½ cups fresh parsley, chopped
1 cup fresh cilantro, chopped
1/3 cup fresh chives, chopped
2 cups fresh spinach, chopped
3 medium onions, chopped
3 teaspoons turmeric
2 ½ pounds stewing lamb, cut into 1 inch cubes
3 tablespoons lemon juice
4 cups water
Salt, Pepper
4 dried limes
2 16-ounce cans red kidney beans, rinsed

Heat a deep pan with ¼ cup olive oil. Add all herbs and spinach, stirring occasionally over medium heat for 15 minutes. Set aside. In a large stock pot, heat remaining ¼ cup of olive oil, then add onions and turmeric. Stir until golden brown. Add lamb, cooking for approximately 6 to 7 minutes, or until brown. Add cooked herbs, lemon juice, water, salt, and pepper. Let boil, then cover and simmer over low heat for 1 hour. Add dried lime. Cover and let simmer for 40 minutes. Add kidney beans, cooking for 20 minutes, covered. Using a fork, pierce the limes, releasing their juices into the stew. Remove from heat. Serve with a side of polow, saffron rice.


Fruit Leather

Make the most of that time of year when seasonal fruit hits the market shelves. Slice or chop fruit, removing any seeds or stems, and place in blender. To preserve color, add 1 tbsp of lemon juice per batch. Adding honey will sweeten the leather and make it more pliable when dry. The consistency should be like golden syrup or salsa, add a little juice or water if necessary. Once pureed spread evenly, and no more than 5 cm thick, on the lightly oiled heavy-duty plastic sheet that comes with your drier (2 cups of puree should cover the sheet nicely). Smooth out with a spatula to remove any bubbles. Pre-cooking the puree will give a brighter, appealing look and prevent oxidization, but cooking results in some nutrient loss. Bring fruit mixture to boil and simmer for a few minutes. Cool before spreading on tray. Set your food drier on medium heat and dry until leathery. Poll, place in bags and consume within a few weeks, or bag and store in freezer for longer periods.


Deluxe Brekky Fruit

This was a great success on a 2009 17-day walking trip across the West MacDonnell Ranges in Central Australia. Source Pomegranate molassess from a continental grocer, or buy some, crush the seeds and reduce the juice.

Bunch rhubarb, chopped into 5cm lengths (6 sticks)
4 apples, halved and thinly sliced
½ cup currants/sultanas/raisins
1 tbsp pomegranate molasses
1 tbsp dark brown sugar

Stew fruit for 20 minutes, or until tender. Dry into leather.


Tips For Preparing Dried Meals

Wintertime is definitely the best time for preparing and drying meals. It’s the season when sticky risottos and hearty stews go down a treat. One thing that I’ve discovered is that meat reconstitutes better if it’s been pre-cooked. What I mean is that the lamb that is going into your risotto for example, is the leftovers from a roast dinner, or similar. You can use the vegetables and gravy too. Lean meet that hasn’t been cooked slow or twice will often be tough when reconstituted.


More Information

The Web is choc-a-bloc with drying information. Type “drying food” or “dehydrated food” into a search engine such as Google and you’re sure to come up with some interesting and informative hits. You can also purchase Micheal’s The Outdoor Gourmet ($22.95) from our bookshop here.


Posted on 8 Comments

Escape to the Beeripmo Walk

Ben Spencer is our guest blogger for this week.

The First Day, Up, Up and Up!

The luxury of a long weekend presented the ideal opportunity to undertake the Beeripmo Walk – a 21km, two-day hike. Located about an hour’s drive west of Ballarat in the Mt Buangor State Park and Mt Cole State Forest, the walk promised to be a great introduction to what is one of Victoria’s lesser known bushwalking destinations. A major enticement was the walk-in campsite which could only be accessed by foot and which we hoped would provide us with a tranquil overnight setting.


My partner Aislin and I arrived at Richards Campground, the beginning of the walk, at about midday after a 2.5 hour drive from Melbourne. Surprisingly there were only two other cars in the carpark. We began our hike in the heat of the day – the sun beat down mercilessly as the track climbed steadily up through the forest. The going would have been challenging enough on a normal day but the heat combined with the weight of our backpacks meant that it turned into a slog. After about 30 minutes walking we managed to make it to the first point of interest, Raglan Falls. At the top of the falls we took the opportunity to throw off our packs and rest. There was little more than a trickle of water but the sound was soothing.

We couldn’t put it off any longer and eventually we shouldered our packs and continued the climb. The trail notes had listed this walk as for a moderate fitness level, which perhaps it would be without our heavy packs. As we approached Cave Hill the steepness of the trail abated for a time but still continued gradually upwards. Glimpses through the trees allowed us to gauge our altitude and a short time later Grevillea Lookout provided us with uninterrupted views of Mt Cole in the south and of the Western plains below. A higher mountain rose to the right of us which could only be the Sugarloaf, which was to form the next goal on our walk.

The rationale behind the naming of the Sugarloaf quickly became apparent as the track rose sharply – it was akin to a sugar cube bobbing in a cup of tea. After our earlier exertions, the climb was now even more challenging and our pace slowed considerably. The track wound back and forth up the cube – no doubt because heading straight up it would have required climbing gear! The path had definitely not been used that day because webs guarded by large spiders continuously blocked our path. A baby brown snake sunning itself on a tree stump was surprised by our appearance and hastily slithered back into the undergrowth. Eventually we struggled to the top of the Sugarloaf and rested for a while as we took in the vista.

It had been a very tiring day, the heat of the sun had thankfully diminished and we were looking forward to making camp. A little while later we reached the secluded Beeripmo Campground. It was everything we had hoped for. The site featured 10 quaint camp pads nestled between the tightly packed gums. There was not a soul to be seen, although a startled kangaroo noisily bounded away upon our arrival. We selected the best spot for our tent and set about establishing our home away from home. After a satisfying meal and with darkness now upon us, we took a short walk to a clearing and craned our necks skywards – millions of awe inspiring twinkles filled the black expanse above.

The Second Day, Mt Buangor, Then Down, Down and Down!

The alarm clock went off at 5:50am – the kookaburras were laughing to each other because the sun had started to rise. The trail notes suggested a similar walking duration as the previous day so we were keen to make tracks before the sun got too hot. We breakfasted and left within the hour, careful to adhere to the ‘leave no trace’ principle. There was still more climbing to do, this time to the top of Mt Buangor. The increasing warmth of the day was only slightly offset by a lovely cool breeze. After a short walk, the trail arrived at an intersection with one way heading to Mt Buangor and the other continuing along the Beeripmo walk.

As the top of Mt Buangor was a side-trip we concealed our packs in the scrub and began the climb, buoyed by the freedom of not having to carry a heavy load. The ascent was no where near as strenuous as that of the previous day, so were pleased when we soon found ourselves at the top. A lonely campervan greeted us on the peak, which was the first time we had seen other people since the start of the walk. The occupants were seemingly still asleep so we tip-toed past them to the lookout and were greeted by the most spectacular view of the walk. The outlook across the Western Plains was vast and we could see all the way to the Grampians National Park, towering in the distance. We soaked up the view then made our way back to the intersection, missing a turnoff on the way but thankfully adding only 10 minutes to the journey.

Pleased with our progress and with renewed energy and high spirits, we continued on. At Mugwamp camp we stopped briefly to apply sunscreen. There were no other campers. Back on the trail we continued gradually downhill, which was the only way left to go after having just ascended to highest mountain in the park. Every now and then the trail crossed quiet vehicle tracks but always plowed straight back into the bush again. As we descended the mountain the terrain began to change. At one point we headed through a dense patch of ferns that were trying to reclaim the trail as their own.

Eventually the trail cut into the side of a steep hill providing a route across what would have otherwise been impassable. With the sun still rising, we arrived at a sign indicating that Richards camp was only 700m away. Our descent from Beeripmo Campground had been much quicker than expected, no doubt due to the downhill gradient and much cooler conditions. Definitely a welcome change to the physical and mental challenges of the previous day. The walk had been an overwhelming success and I strongly recommend it to those looking for an easily accessible two-day walk.


Posted on Leave a comment

Mike Graham; a Day at Arapiles (1980)

California-based climber Mike Graham first visited Arapiles in 1980. He and his partner, Wendy, flew into Melbourne and stayed at my parents house in Lilydale. I think it was a relief for my parents to see that I actually had some ‘normal’ friends rather than the weird riff-raff that usually crashed on our lounge room floor.

Mike was a member of the legendary Stonemasters, a group of talented southern Californian climbers that included the likes of John Yablonski, Tobin Sorenson, John Long, Rick Accomazzo and John Bachar. At Arapiles Mike and Wendy immediately fitted in really well with the locals, who, in the fashion of the Stonemasters, were busy rewriting the history of Australian climbing.

I shot these photographs of Mike leading an early ascent (in 1980) of No Exit (25, 5.12a). I remember that day really well because both Kevin Lindorff and I also led the pitch. Mike, Kevin and I took turns in belaying each other. Peter von Gaza, another visiting US climber was also with us. Kevin and I had both previously led No Exit and Kevin had also seconded Kim Carrigan when he added the superb second pitch.

No Exit was put up by Chris Peisker in May 1979 and it quickly became a classic test-piece. The first clip is a really crappy dowel thingy, a style of bolt that was quite popular in the US at the time. Some thin bouldery moves lead into a flaring bottomless crack, which quickly relents. At the top of the crack, and just when you figured No Exit was in the bag, a desperate mantel does its best to ruin your day. This final awkward move has seen more than a few climbers come unstuck. Interestingly, it’s the grade 23 second pitch which I reckon is the real standout. Unfortunately it doesn’t get done all that often, which is a shame.

Notice the cool harness that Mike is wearing. It was made by Chouinard Equipment and is constructed out of a single length of white webbing. I can’t remember its official name but it was actually a great bit of kit. I went through at least three of these units. It was one of the first real harnesses developed for rockclimbers (as opposed to the Troll Whillans Harness which was used by rockclimbers but was in fact designed for high altitude mountaineering.

We spent the afternoon bouldering in Central Gully. I took a few pics of Mike doing Guillotine (V3) on the block right of Pebble Wall. I think Mike really enjoyed the technical nature of Arapiles and it seemed to suit his strong ethical nature, which formed the basis for much of his climbing.

Mike later teamed up with Mark Moorhead and in May 1980 he led the first ascent of Ride Like the Wind (25, 5.12b), one of Araples’ now classic bold wall-climbs. Mike returned the following year to lead the first ascent of Breezin’ (24, 5.11d) another bold on-sight effort.

In 1982 Mike created Gramicci Products, a climbing, surfing and lifestyle apparel brand set in Southern California. He is also credited with designing the first collapsible portaledge, which he sold under the Gramicci label in the early 1980’s.

Posted on 2 Comments

Mt Donna Buang, 1914; Sawmills and War

I found this really interesting article in The Argus from Friday, March 27th 1914. Reading it made me realise that logging in the Upper Yarra Valley was already of an environmental concern even 98 years ago. Exactly three months after this article appeared in the press, World War 1 broke out and Australia changed forever. Who knows, perhaps this early show of distaste against the actions of the logging industry may have taken root had it not been for two consecutive world wars. The photograph below is sourced from the State Library of Victoria. It is titled View of track through forest on Mount Donna Buang, Victoria’ and was taken in 1911. The photograph ‘Gully at Five-Mile Bend on road to Cement Creek’ accompanied the original article.


THE GULLIES OF DONNA BUANG
BEAUTIFUL TOURIST RESORT. DISAPPEARING BEFORE THE AXE
The Argus, Friday, March 27th, 1914.

Under the shadow of Donna Buang, within five miles of the little town of Warburton, are some of the most beautiful gullies in all the Victorian hills. The longest summer does not dry their sparkling streams, nor warm the cool air in the shaded glens. Ancient peace reigned there until the ring of the axe lately drove the lyre bird from its haunt among the fern. The mountain is being stripped of its beauty for the cash value of its stately trees.

Two or three years ago the Department of Public Works entered upon the construction of a coach road from the township of Warburton to the top of Mount Donna Buang, where snow lies in the winter some times 4ft deep. From the top of this peak the traveler looks down on the valley of the Yarra and the villages clustering along its banks. Far up into the farther hills both the river and the Woods Point road wander like two ribbons through the forest’s dark green. Realising the aesthetic value of the beautiful gullies and the lofty mountain peak, the department spent the sum of £3000 on the construction of the road. There was no cooperation, however, between the Forest department and the Department of Public Works. The object of the latter was to see that the money was not wasted by the destruction of the gullies and mountain streams that were expected to attract thousands of tourists to the place. The interest of the Forestry department seems to have been to obtain the greatest possible revenue from the saw-millers in the form of royalty on the trees cut down. After a delay of nearly two years, a reservation, only three chains wide, on either side of the road has been made by the Forestry department, after some of the most beautiful gullies have been either spoiled or quite destroyed. Even if the three chain belt is left untouched, the narrow strip will not conceal the bare mountain side beyond. The beauty of the gullies will be gone.

The road winds northward round the range until it reaches the head waters of the Cement Creek. This stream flows down a deep gully thick with ferns and moss- covered beech trees through which the tall mountain ash tower like the pillars of a vast cathedral. The bottom of the gully and the valley beyond cannot be seen. Only the echoes of the stream as it splashes far below, reach the ear with a soft, inland murmur. The road makes a sharp bend here, and a space has been made, wide enough for a coach and team to turn. The water bubbles from the mountain side the whole year through. Even now, in spite of the long, dry summer, the ground is still wet, and the air so cool that it strikes the traveler with a chill. How long this will last one cannot say, for a little further down the gully, so near that the steam whistle breaks discordantly through the stillness, a sawmill is busily at work, cutting its way through the bush for the sake of a few payable trees to be obtained. Before long all but the narrow strip reserved from destruction will be cleared. The beauty of the gully will disappear, and the creek, in all probability become a winter torrent, leaving in summer a paltry stream of water trickling down the seared mountain side.

These gullies have other values than the market price of the trees now growing in them. If properly preserved, they would bring to the district and to the state far more revenue and abiding wealth than the royalty, which for a little while, the saw-miller will pay. Around the road, particularly where it crosses the Cement Creek, a sufficient area should be reserved to maintain at least the illusion that the traveler is in the heart of a mountain forest.


Posted on 7 Comments

The Mattress Backs of Taipan

We were walking down the trail from Taipan Wall when Michael abruptly stopped, dropped to his knee and pointed excitedly into the trees. I crouched down next to him and after a few moments I could make out something moving in the boulders. Two small faces, beanies pulled down over their tiny ears, large brown eyes scanning the rocks above them. My heart skipped a beat as I realised we were seeing a pair of elusive marsupial mattress backs (Matterbackious dynocranker).

Like most people I’d only ever seen mattress backs in the gym, playing with themselves in dark corners, swinging by their arms and waiting for feed time. Of course I’d heard their distinctive vocal calls and even stumbled upon their empty caves, but seeing them in the wild was a first for me. Here in the Australian bush mattress backs were once an endangered species, but are now thought to be increasing in numbers. Easily identifiable by the large mattress which they carry on their backs and the woolen beanies they wear on even the hottest of days, mattress backs are among our most elusive and secretive creatures.

What makes this species so unusual, however, is the elaborate rock dance that they periodically perform. Experts believe the rock dance is some form of complex mating ritual. The male, usually the shorter and stockier of the species, steps carefully onto the rock, twists his body into a variety of contorted positions and then, after just a few brief seconds, falls heavily onto the mattress below. These rock dances must require a great deal of effort as the male then rolls over and falls asleep.

Interestingly, if a female of the species is within sight, the male will immediately get up, shake his hands and step back on the rock. This process is repeated many times in a row. The female pretends not to notice the dancing male as she checks her Facebook account, applies her lip balm or changes the wallpaper on her iPhone for the umpteenth time that day. Her tactic appears to be designed to enrage the male mattress back who launches himself into ever more contorted positions accompanied by loud grunting. If there is still no reaction by the female (who may be playing Angry Birds by this stage) the almost exhausted male mattress back will resort to stripping to the waist in a final desperate bid for attention. Observers who have been lucky enough to have witnessed this part of the ritual have reported that after adjusting her Prana pants the female pulls on to the rock and imitates the same dance moves. This results in a sudden wave of interest among the nearby males who all stride forward with outstretched arms, the palms of their trembling hands just millimetres away from the female’s buttocks. As she dances her moves the males all yell in delight, crowding around her in a sort of group-sex rugby scrum. Eventually she collapses onto the mattress and the males all start wailing and pointing at the rock in apparent despair. This highly sex-charged atmosphere now triggers the males to pull on their beanies and launch themselves in a mad frenzy at the rock.

Occasionally a female will begin her rock dance and actually reach the top of the boulder, at which point all the males immediately lose interest in her, fall silent, put on their shirts and walk off in various directions to brood by themselves. The female then retires back to her mattress where she posts her ascent on Facebook.

Unlike other marsupials, mattress backs, both male and female, carry their pouches on their backs. These pouches are filled with a white substance, which they use to daub across the rock to mark their territory. Males also use urine to mark their territory, a habit that females rarely seem to do.

A sub species, the bearded mattress back (Matted dynocranker) can also be occasionally seen. This sub-species tends to be less energetic than their clean-shaven tribal brethren and are usually physically larger and more bombastic. Their rock dance ritual is also much less complex and only lasts for a second or two, after which they spend the rest of the day sitting on their mattresses, softly grunting to themselves.

Lone mattress backs are another enigma. Almost only ever spotted accompanied by a tripod and Go-Pro camera, it appears that lone mattress backs can only perform their complex rock dance routines when videoing themselves. Zoologists originally considered that lone mattress backs were a separate sub-species (lone mattress backs tend to be balding and wear glasses) but now believe that they are the result of a serious psychological impairment, having an inability to perform when observed by other members of their tribe.

And so it was that after a minute or so the two mattress backs noticed our presence and quickly vanished into the boulders. Michael and I walked over to where they had been sitting. All the tell-tale signs were there. A couple of old worn toothbrushes, bits of finger tape and some daubs of chalk on the rock. The acrid smell of urine indicated that we had just witnessed two young males at play with each other. We felt very lucky indeed to have seen these mattress backs in their natural habitat. I even stepped in a mattress back stool. Now how cool was that?